Sunday, April 1, 2012

Stuck!


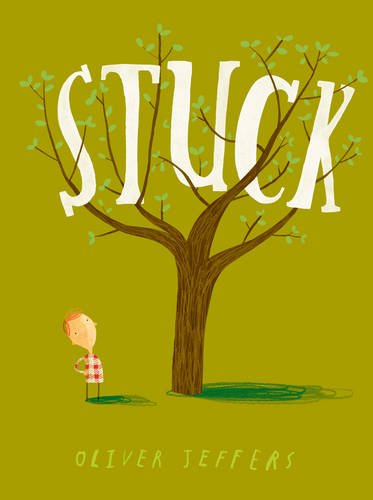
Jeffers, O. (2011). Stuck. Great Britain, HarperCollins Children’s Books.
ISBN#: 987-0-00-726386-8
This book I found was rather goofy. It is about a young boy getting his kite stuck in a tree. He then did what most of us would have done, throwing something at the kite to get it unstuck. It started out pretty simply by throwing up a shoe, but when the shoe became stuck he started trying different objects that one could find close to home like doors, ladders or milkmen! But when all these things became stuck in the tree Floyd went even further he started throwing other objects you would not believe, to the point where the tree was so overcrowded with objects that there was no more room and the kite was finally shoved out. I believe this would be a good book for three to five year olds because it is straightforward and different. This book is easy to relate to because of the situation the main character is going through and the emotions that he is feeling. This is also a good book because it is just plain funny. The lesson I took from it is if you keep trying and don’t give up one can achieve anything.
I had a hard to time finding anything on the creation of the illustrations of Stuck but I believe Jeffers might have used digital media to create them. At first I thought it was paint mixed with water colour crayons because it has the same effect as when I combined the two. But then I realized some parts of his art didn’t match this style at all. The simplicity of this style had my imagination playing and gave me very vivid pictures in my mind. I enjoyed how Jeffers played with colours to evoke certain moods, for example he had on page coloured with only different tones of red to create anger, or green which for me symbolized hope or a good idea.

Building background knowledge or provoking interest for this book can be quite fun. To go about doing this I will have my felt board and attached to it I would have my tree and one object that is stuck to the top of the tree. Then we would be outside just before we read the book. The children and I would find a kite stuck in the tree and we would do whatever we could to get in unstuck (throw beach balls or other soft objects so as no one gets injured)
There are multiple places in this book that we could stop and wonder with. When he fetches the ladder I wonder if it really is “going to sort this out once and for all” or then after the ladder I wonder if he had any other good ideas. I would see if the children have any wonders here. When he has his final bright idea I wondered what it could be. If I were to chunk the book I would chunk it on the page were it says “AND THEY ALL GOT STUCK.” I would finish the book off with a final wonder on the last page. I would wonder if Floyd finally got everything unstuck from the tree and I would hear the thoughts of all the kids.
Ways to tell a story
#1 Felt story-
What I need: - Felt board any colour is ok
- Felt characters, tree, boy, kite, two shoes, a cat, a ladder, a bucket of paint, a duck, a chair, a bike, a sink, a door, a car, a milkman, an orang-utan, a small and large boat, a rhino, a truck, a house, a lighthouse, a whale, a fire truck and man, and finally a saw.
#2- rock story.
What I need: - I will need several rocks preferably some larger and some smaller to imitate the different sizes of the objects in the story. I can find rocks in nature and some in stores like Michal’s, I would also need card stock with each picture laminated then glued on to a rock with a glue gun. Or one can just paint the picture on to the rock using acrylic paint.
#3- audience participation
What I would need: -individual masks of each character which is then laminated to make it more durable. I would also need to have a large green piece of fabric to symbolize the tree.
#4-clothes line story-
What I need: a thick piece of string and 30 wooden clothes pin (there will be extras just in case), then I need a picture of each character or object in the book printed on to card board paper and then laminated. I am going to have the boy be a puppet which I will have in my hands for the presentation. I will be changing the story around for this presentation so that it is in first person and not a narrative.

Extensions:
1)Kite making- being able to make each child’s unique by letting them decorate it however they want. (Paint, ribbons…etc) then of course going outside to fly them.(lead to other books about kites)
2)Nature walk- Go out to see what other things get stuck in trees and what animals you can find in trees. I would want to discuss the differences compared to the book and then learn more about other animals(lead to other books)
3)Explore different styles of kites and the different styles in other countries. Have them draw their dream kite.
4)Books- The legend of the kite- Jiang Hong Chen
-Cat Up a tree by John Hasset and Ann Hasset
Stuck on PhotoPeach

I spy


Gibbs, E. (2011). I spy with my little Eye. Massachusetts: Templar Books.
ISBN 978-0-7636-5284-5

This book is about the frog that spies with his little eye on different animals. This frog doesn't introduce himself till the end of the book, but he says the colour that he sees each time. Each animal gives a clue about themselves, and then each of them introduces themselves by saying what kind of animals they are. The animals that are introduced in this book are: the whale, the elephant, the polar bear, the lion, the orangutan, the fox, and the frog.

The reason that I use this book for children 3-5 years is that this book brings wonder in children, and the way that it presents it makes them follow through the book and finds out what will happen at the end. The main things that make this book interesting for children is that it makes them think and guess about the images of this book, and also, the circle cut that each page has it makes this book interesting for children. This book introduces the name of different kinds of animals and their colours to children. Children are also taught to see the details that are surround them. As well, they learn to improve their sense of vision through these images. This book is a very simple book but it is the best way for us as teachers to create an interesting way for children to teach them different kinds of things and make them familiar with their colours of those things and their characteristics.

This book brings the mood of wonder and interest in children. The children enjoy it because it makes them guess. The bold format and the holes on each page makes children interested to look at this book and read it.
On the day that I would like to tell this story before the children come to the class in morning, I will put either the frog that has lenses on his hand on a spot in the classroom that children see a lot, or I will put one of the laminated pictures that covers it with a piece of the paper that has a small hole on it to just show the part of this image on the board of the class room or on the ceiling of the classroom. I will also put an eye image at the corner of the front page that has a hole on it. This way I will introduce the book that I would like to read to children later on that day. Children might notice the picture or the frog, or they may not even notice the clues. But they will notice why I put the frog or the image in the classroom after I read the book for them. Before I started to read the book, if I found that none of the children noticed it, I would ask them, “Does anyone wonder why this image and this frog is here? This way I will create wonder for them.
The animals characters of this book that I will use for each part of these methods are: the whale, the elephant, the polar bear, the lion, the orangutan, the fox, and the frog.
• I will use the magnet cookie sheet and paint one side of it blue and the other side green. The blue will represent the water and ocean. The green side will represent the jungle. I will divide the animals of this book in these two groups and create the animals that are mentioned in this book with magnets and put them on this cookie sheet. Also, I will design another square piece for each of these animals, and this piece has a small hole at the middle, so this hole just shows the part of these animals. When children guess the animal, I will take this square piece from that animal and I will continue to do to it the same as the book mentions.
• I will use the felt board and design the felt animals that are in this book. Then I will use the small square felt piece that contains the small hole in the middle part of it so I can cover each animal with it and continue to tell the story as the book tells it.
• I will use the cube shape jar or box. On each side of this cube box I will create one thin space from inside, like an album, to put the picture of the animals in it on each of these four sides. I will then create a sheet that has a hole in it to cover the image and show just a small part of this animal. I will start to tell the story by going around this cube shape box or jar.
• I will laminate the animal pictures of this book and I will use the rope to attach this picture on it. Also, I will use a piece of the paper that has a small hole on it to cover the pictures. Then I will design the frog puppet that has the lenses on his hand and look at these images and tell the story of this book.


The three possible extensions would be:
• I will design the cards that look like these cards from two pages that are attached together at the centre. On the front page, I will cut a small circle in the middle, and it will just show the part of that fruit or vegetable picture that I have drawn on the back page. Children will need to guess what it is. When they guess the picture, then they or I can take the first page off, so they find out about the answer. By this way, they can learn about different kinds of vegetables and fruits. I will leave a clue on the front page for each card. I know that children can't read by the age of 3-5, therefore, I will start the game for the first time and I will read the clue sentences for them. So they will be familiar with the clues. Even though the children can't read, they might create their own clues when they are playing this game with other children.
• Another possible extension is that I would like to take the children outside and say to them, “What can you spy with your little eye?" I will then carry my camera with me and each child will take a picture of that spot or thing that they found. On the next day, I will print the pictures for them and they can draw the spot or the thing that they spy with their little eye. After that, I will create the cards for them exactly the same as my first extensions idea. Then children at the end can go around and ask others to guess what is the image that they spy with their own eye. At the end, I will make a copy of their cards and create a book for them with all their cards. In that book I will write for example, "Ann spies, with her little eye, something that is green” the same as the book sentence. I will just add the child's name and the colour of that image. Also, for the clue sentences I will ask that the child tells me what we can put as a clue sentence.
• For the last extensions, I will create the lens that looks like a cylinder. This cylinder contains two horizontal cuts so that I can put the two pieces of paper through these horizontal cuts inside of this cylinder. The front cut is the place that I will put the paper that has a hole in the middle part. The second horizontal (the back horizontal cut) is for the paper that has the picture of those things. I can introduce different groups of things each time, for example, I can introduce the other animals that this book didn't mention. Then I will ask them to choose one animal that they saw through these lenses and liked, and then I will give them clay so they can create the image of that animal that they saw through the lenses and liked. On the next day, when we have the circle time, each child will introduce their clay to others. He or she will say the name of that animal, and I will talk about a little bit about that animal's characteristics. I will use these extensions and introduce the fruits, flowers, vegetables, etc.

I spy with my little eye on PhotoPeach

Plant a Kiss


Plant A Kiss. Amy Krouse Rosenthal and
  Peter H. Reynolds. Harper. 2012.

ISBN # : 978-0-06-198675-8

This a picture book story about a little girl named by the author simply as “Little Miss”. She kisses the soil, waters, and waited for her plant to grow. The results are incredible. Little Miss  shares this wonderful gift with her everyone around her. She does this despite the warnings of her friends  against such an action. Eventually she had nothing left and returns to the spot where she first planted the kiss, only to find that her magical substance had grown immensely. Out of just one kiss comes “Endless Bliss”.
It is  a story of  how one little act of love can be the start of giving so many people joy.

I would use this book with 3-5 year olds because it is a very simple story which is at the same time intriguing. On the children may wonder what will happen next and might try to predict the outcomes as the events unfold.. Another reason is that there are few words yet the story of Little Miss evokes thought and wonder. It is a story of sharing, something that 3-5 year olds are learning to deal with. It teaches that giving does not mean the giver  has to lose in anyway what-so-ever and can result is that the giver may get something returned a hundredfold. It is a story of how a simple act of love can lead to magical wonders.

The illustrations are simple and uplifting. They are drawn in black in and then a water color wash over it. There is no background except the white of the paper to detract from the actions of the figures that are drawn. The is a minimal use of color. Little Miss is almost totally shaded in grey and she is the main character in the story. What is very colorful is the bright red bowl from which she distributes her magical result of planting a kiss. The odorous substance it self is in pink polka dots and shimmery with iridescent coloring. The mood the pictures invoke is one of clarity and being at peace with its minimal use of color and  large expanses of uncluttered white background. They invoked in me an instant empathy for Little Miss. The children would probably like them because the  illustrations are cartoons and the back ground might give them a sense of lift and open space. They might love to magical sparkly result of the kiss and empathize with a skinny little girl in baggy long and stripy shorts and a T-Shirt with her hair tied in a pony tail. They might like the contrasting  intensity of color of the red bowl. I was drawn to the illustrations and its minimalistic portrayal of the story. The picture told a story as much as the words did. With a few strokes the illustrator takes us through a range of emotions and actions that the child goes through and made me experience a wide range of feelings too. I instantaneously loved Little Miss … as soon as I saw her I was drawn to her.

As a provocation I would have a large picture or overhead of the page in which Little Miss plants a kiss and would only have the illustration placed in a prominent position. The children may wonder if she has planted something,  and if so what was it that she was planting?..  I might use the page before that one on the previous day and the children may wonder whether she is burying or digging some thing up. I might place many little red baskets or bowls and place the in interesting places in the class room. The children might wonder why they are there like that, the most probably use the basket for putting things in themselves.

Some ways I might present the book:

 1. Reading the book itself as a circle time story.

2. Felt board story- I would have Little Miss in her various moods and performing various actions. I would also have pieces of each of the other unnamed children in the book, such as the chubby little black boy or the boy in pale pink, as well as the red bowl, full and empty. I would also have different pieces for the different states of the magical substance, such as when it just sprouts, as it grows, what it looks like wafting in the breeze, and what it looks like in the end. I would do this all on a background of white felt. I would make these my self as I enjoy the process. I plan to either draw, water color and cut out, the pieces on felt or on photocopies. If the pieces were to be of paper then I would laminate and glue Velcro on the back of them.

3. I would like to make a magnetic board story presentation here I would have the same pieces.  This time I would copy the pictures onto sticker paper and glue them onto a magnetic sheet and cut them out. I would use a cookie tray painted white as my board.

4. Story Basket- I would have a doll which I would dress up as Little Miss and other smaller people. I would have a toy watering can and shovel if I could find them and a little red saucer, bowl or basket. I might have glitter as the magical substance.

5. Story stones- I would either photocopy and color the pages with the different characters etc. and cut them out. The I would decoupage it on to River rocks and present the story with my voice and the rocks. I would also Like to try painting the stones with acrylic paint.

6. Story Vine- I would  have the same kind of pieces except I will enlarge and laminate then cut them out. I would pin them on the cord or string as the story unfolds.

7. Story Yoga-. I would tell the story verbally while going thorough the different postures and in the same sequence as Little Miss takes. I would also have a diagram of a child in each of the poses which will be on individual pages which I will Laminate, then make into a ring holder book as references for the children and myself.
I would like to see if my niece and nephew will do the yoga postures while  I photograph them.

Extensions of this story are giving each child a red basket and asking them o fill them with what they think their own magical kisses would look like.

Giving the children a wide variety of art supplies and asking them to paint and decorate their own magical substance.

We might branch onto planting a seed, tending it and watching sprout and grow. The children would learn how a plant needs water soil, air and sunlight, and care to grow.

We could visit a plant store and look at the different plants. We could learn how different trees, plants and other growing things need different conditions to grow.

We could plant our own flower, berry and vegetable garden.

Plant a kiss on PhotoPeach

Grumpy Bird


Grumpy Bird
Jeremy Tankard
ISBN-13: 978-0-439-85147-3

This book is about a bird that feels grumpy in the morning.  He does not want to eat, to play, or to fly.  He decides to walk.  On his way he sees different animals that accompany him on his walking.  Then he decides to do some exercises and his friends do, too.  It causes his mood to change and he becomes happy and goes back to his nest with his friends to have some snacks.

I think this colourful book is a good story for children 3-5 years old, because this story encourages children to pay attention to their friends and, if one of them is not in a good mood, to try to help them to change their mood.  Also, they can learn about different animals to help them to build their vocabulary.

The illustrations are blended with the white and black photos of nature that are blurry in the background and very simple drawings of scenes and characters in ink and digital media.

I would get children attention by hanging a grumpy face and a happy face on the wall.  Children can compare these two photos and talk about these two emotions.    Then I would ask them “how do you feel today, grumpy or happy? If you or your friend feels grumpy what can we do to change their mood?”  Then I would sing a song about feelings with the children to bring them together.

Encouragement song:
“Ram sam sam
A ram sam sam, a ram sam sam
Guli guli guli guli guli ram sam sam
A ram sam sam, a ram sam sam
Guli guli guli guli guli ram sam sam
A rafi, a rafi
Guli guli guli guli guli ram sam sam
A rafi, a rafi
Guli guli guli guli guli ram sam sam

 “The more we get together”
The more we get together
Together, together
The more we get together
The happier we'll be
Cause your friends are my friends
And my friends are your friends
The more we get together
The happier we'll be

The more we play together
Together, together
The more we play together
The happier we'll be
Cause your friends are my friends
And my friends are your friends
The more we play together
The happier we'll be

The more we dance together
Together, together
The more we dance together
The happier we'll be
Cause your friends are my friends
And my friends are your friends
The more we dance together
The happier we'll be

The more we get together
Together, together
The more we get together
The happier we'll be
Cause your friends are my friends
And my friends are your friends
The more we get together
The happier we'll be
The more we get together
The happier we'll be
The more we get together
The hap-pi-er we'll be

 Ways to present the story:
1-Felt board: A black felt board and felt characters.
I would use the board and tell the story and the characters will show up one by one during the story.

2-Basket: I would need a basket to put all my stuff into.  My things are little toy animals, a green scarf for the ground and a tree.
I would put the green scarf on the ground and put the little toy bird on the top of the tree and start the story.  Each animal comes out one by one from the basket.  Children are interested in which animal comes out next, or they can anticipate which animal is coming next, if I’ve already told the story.

3- cloths line: I would make each character from fabric or coloured paper and I need a string to hang Bird on the line and start the story.  I will hang each character with the clothes pins on the line during my telling of the story.

4-Another way that I am thinking about it is to make two sets of each character out of cardboard.  And I also need a large pocket that is decorated with a photo of nature with a tree and a nest in it. I will take a twig, or a stick, and glue each animal on it in the order of the story.   Then I put the animals glued on the twig or stick into the pocket. I will keep the second set beside me. When I am telling the story I will use the individual characters to greet and talk with Bird and then when they decide to follow him I will pull out the twig gradually.  At the end of the story when they fly to Bird’s nest I will use the separated animals again and stick on the pocket.

5- Finger puppets: I would make tiny puppet animals from fabric or paper for each finger then they go on my fingers one by one during the story.

6- Drawing the story: This is the easiest way to present the story.  Since the drawing of the characters is very simple, I could draw characters when they appear in the story.  I need just a large paper, which put on a stand and different colour of pencils crayon.

 Extensions:

Art:
-Asking children to draw how they feel.

-Making different parts of face in various emotions and ask them to make their own face on paper plates or cut out circle paper.

Social:
-Talking about emotions; sad, happy, mad, surprised, frustrated and proud during circle time and asking children to make these faces.

-Reading other books about emotions: “The way I feel” by Jana Cane or “How do you feel?” by Anthony Browne

-Role-playing: Each child takes a puppet of each animal or a mask or a felt character or a toy if they are available, and role-plays the whole story.

-Making a class book about different feelings and talking about what causes these different feelings.

-Singing songs about emotions:

“Happy face…”
Happy face, happy face, what do you see?
I see a sad face looking at me.
Sad face, sad face, what do you see?
I see an angry face looking at me.
Angry face, angry face, what do you see?
I see a grumpy face looking at me.
Grumpy face, grumpy face, what do you see?
I see a sleepy face looking at me.
Sleepy face, sleepy face, what do you see?
I see a surprised face looking at me.
Surprised face, surprised face, what do you see?
I see all my friends looking at me!
       
“If you are happy and you know”
If you’re happy and you know it, clap your hands.

If you’re happy and you know it, clap your hands.

If you’re happy and you know it, your face will surely show it.

If you’re happy and you know it, clap your hands.

If you’re angry and you know it, stomp your feet.

If you’re angry and you know it, stomp your feet.

If you’re angry and you know it, your face will surely show it.

If you’re angry and you know it, stomp your feet.

If you're excited and you know it 
Shout hurray.  Hurray.

If you're excited and you know it 
Shout hurray. Hurray.

If you're excited and you know it 
and you really want to show it 

If you're excited and you know it
Shout hurray. Hurray.


Wonder:
I would show the first page and ask children how Bird feels? After, I would elicit the response I can make my first ‘wonder’; “ I am wondering why he is grumpy?”
Another wonder can be made on page 19 where Bird stopped, “I am wondering why he stopped?”  Every child can have different responses.
The next one can be on page 21.  I could ask:” I am wondering why they stood on one leg and jumped?”
Definitely different responses come out.
So I would ask the children: “If you stand on one leg and jump, what are you doing”?
Their answers can vary. Maybe one child replies ‘do exercises’ and I will continue my question, “So if you do some exercises, how do you feel?”  They might answer “fun”. Then I continue my reading to finish it.

I would leave the felt board for them to tell their own stories or they can pretend to be grumpy and role-play the story with their friends.

Grumpy Bird on PhotoPeach

I have a little problem said the bear


Janisch, H., & Leffler, S (Illus). (2009). “I have a little problem,” said the bear. New York : North-South Books Inc.
2. ISBN #
978-0-7358-2235-1
3. A paragraph describing the book content. (This paragraph is to be in your own words and not simply taken off a bookstore site.)
“I have a little problem,” said the bear is a story where one bear who is afraid of being alone in the dark cave, visits several different people to solve his problem. However, whenever he starts to talk about his problem, people all assume and think they have a solution for the bear before even hearing his problem; except for one fly who truly listens to bear. From the context, each person (inventor, tailor, hatter, doctor, etc...) thinks the bear has a different need based on what they can do for him (wings, scarf, hat, vitamins, etc…), which addresses the issue of perspective that causes predetermination on others. Also, the book shows the importance of the pedagogy of listening by illustrating the frustration of being ignored.


4. A few sentences describing why would you use it for three to five-year olds?
First of all, I would use it for three to five-year olds because I thought children could completely understand the bear’s frustration more than anyone else. As they are reading the story, children will perceive various emotions from the things that are happening to bear because they know how it feels like when no one listens to what they say. As well, the author uses repetition in the beginning and the end of each page, which children would enjoy and love to follow; therefore, this will help children to participate more actively during the story time.

5. A comment on the illustrations should also be included. Example: How are the illustrations made? What medium was used? What mood do they evoke? Why would the children enjoy them? Why were you drawn to them?
This book is illustrated by Silke Leffler, she is a famous children’s product designer of Ikea. The most interesting part of her art is that she uses collage style illustrations by putting bits and pieces of fabrics, cards, calendars, and different kinds of papers. In addition, the each page have very specific and detail background that helps children to understand and explore different settings of the book. For example, there are unique kinds of hats are displayed behind the hatter, various kinds of glasses are hung beside the eye doctor, and also different types of shoes are arranged by the shoemaker. Silke’s illustrations are very attractive and clever; especially the part where she uses a thimble for the tailor’s hat is amazing! I personally love the way she keeps the pencil marks on her drawings because it looks very natural and blends well with the water crayons.

6. How would you build background knowledge or provoke interest for the children in the book before you present it? What provocations would you use? How would you go about using the provocations?
Day 1 – focus on the art of listening (Why is it important to listen to others? through the games and activities children get chance to understand the importance of listening)
Day 2- print out the front cover of the book and post it around the classroom at least for three days (door, desk, board, floor, and window)

7. Provide a detailed description of at least four ways you might present the book – list the props you might use to present the book. If you suggest a felt story, what pieces would be needed? Is there a place you can get the pictures, or felt pieces ready-made?

a) Felt book
For the pieces, I would need bear, fly, face of the town people (inventor, tailor, hatter, doctor, street vendor, eye doctor, shopkeeper, and shoe maker), and objects (wings, scarf, hat, vitamins, chain, glasses, jar of honey, and boots). I will use the felt sheets to create those characters and the objects. The felt book is same as the felt board, but it is foldable and easy to carry.
b) Magnetic story
I need a cookie sheet, and the pieces for the bear, fly, town people, and objects for my magnetic story. In order to make the pieces, I will scan the illustrations from the book and print it out on the magnetic paper.
c) Pocket story
I need a wall hanging organizer, stuffed bear/fly, finger puppets for the people, and plastic toys for the objects.
Hide all the pieces into the pockets and pull it out as I present the story to children, this evoke children’s curiosity and make them wonder about what’s in the other pockets.

d) Stick story
I would draw and colour the characters, laminate them, and put them on the stick. This story can be presented in the puppet theatre, and I would turn off the classroom lights, and use the lamp to illuminate the theatre area only (children will focus more).
What pages would you stop and wonder with the children? Why? What would you wonder? Would you chunk the book? How? Why?
I would stop on the second to last page and wonder with children about the bear’s problem. I would cover up the text side with paper and show the picture side only, and share the ideas together.
I have a little problem said the bear on PhotoPeach

How high is the sky


HOW HIGH IS THE SKY?
- Milbourne, A. (2009). How high is the sky? London: Usborne Publishing Ltd.
- Illustrated by Serena Riglietti, Designed by Laura Wood
- ISBN: 978074609584-3

- The book called “How High is the Sky” is a story about Pipkin the penguin who is curious about everything in the world. One day, he was wondering how high the sky is. He went on the adventure to find out the answer. On his adventure, an albatross, a gorilla the air balloonist, and rabbit the astronaut helped him to explore the world. Finally, he found out that the sky goes on forever, and his mom replied “there are a lot more to find out in the world.”

- I choose this book because most of children are curious about the world like Pipkin the penguin in the book. Especially at the age three to five, children’s desire of curiosity is vigorous. Children love to explore new things and always ask tons of questions. Thus, this book can give children a lesson; when there are curiosities in your mind, don’t hesitate to question. There is no right or wrong answer, and you can even get the answer by exploring the world by yourself. Also, this book helps children to learn the actual concept of the height through an extra information page in an envelope at the very back of the book. It is a folded piece of paper, which becomes very long when unfolded, to give children a sense of how high the sky is. This rather complicated information is explained with illustrations and simplification of the author.

- Illustrations are done by water color, and very delicately. Also, illustrator used various colors, so it looks very gentle and soft. Thus children will love it!
Provocation
- I would like to build the background knowledge of this book through showing them three different types of skies: light blue sky with some white clouds, dark blue sky with some clouds and complete black sky with lots of stars. So, first day, I will put picture of light blue sky with clouds on the ceiling all day. Next day, there will be second picture which is dark blue sky with some white clouds on the ceiling. Third day, picture of black sky with lots of stars will be on the ceiling, and last day, I’ll read a book to children. Through this provocation, children can picture in their mind that how the sky looks like when it goes up and up.

Four ways of presenting
- 1) I will prepare five pieces of thick paper and cover them with felt. Then, I will connect them with rings, which will allow them to fold together. Each paper will represent each height Pipkin has travelled. All the characters and backgrounds in each scene are made up of felt. As the story goes on, I will unfold, and by the end of the story, children will be able to see how long the paper is, which is relevant to how high the sky is.

- 2) This is a popular method used in Korea: I will use corrugated cardboard to make animal models for children to play with. I got all different colors of corrugated cardboard from Korea. Even though corrugated cardboard is a paper product, when I roll it to make a model, it gets harder, and I will use hard glue, so it won’t fall apart.
- 3) I will prepare all different types of miniature models in the story basket, so that children can do free play. For example, prepare 12inches Styrofoam ball and cut it in half, then it will become an igloo. Left-over felt can be snow on the ground, and so on.

- 4) I will make a crown with a laminated main character on it. A crown is made up of felt. Children can put on a crown and perform a role play.

Extension
- 1) I will ask the question to children: “What would you do and where would you go if you were Pipkin?” and get the children to answer by drawing. Through this activity, children can let their imagination run free. I will provide children different types of art supplies such as; pencil crayons, markers, water color paints and so on.
- 2) I will introduce the sequent books to children, How Deep is the Sea, or How Big is a Million? This will provoke children’s curiosity even further, while teaching them a sense of measurement and numbers.

- 3) I will ask the question to children: “What else could be in the sky?” Then children will mention all different kinds of products. Gathering up all the answers, we as a whole class can make our own sky. I will provide children a large piece of paper as a background, and other art supplies and materials such as; pencil crayons, markers, recyclable cups and lids, cotton balls, tape, glue, and so on to draw and make whatever children want to. Through this activity, children can express their thoughts freely and widely.

The box of crayons that talked


ISBN 0-590-81928-3

A young girl is strolling through a toy store and discovers a box of crayons that are not getting along. She buys the box of crayons and brings them home. She spreads out all the different coloured crayons so that they can see each other. She creates a picture using all the colours by mixing them. The crayons admire the beautiful picture they created together. The little girl helped the crayons realize that every one of them is unique and that when they include each other they can accomplish more.

This book sends out a great message to young children about sharing and including others. The simple rhyming and illustrations give the children a clear understating of the value of teamwork and encouraging diversity. The children can relate to this story through their interactions with other children.

Using a layering effect with coloured pastels, created images that resembled a child’s drawing, made the illustrations. The exaggerated expression of the crayons brings comedy to the story and allows the children to easily see the problem at the beginning of the story and then see the problem resolved. The bright colours and use of every colour from a crayon box attracts a child’s attention. Children that I have worked with like to try and recreate images they see in books. I like the simplicity of these illustrations because they allow young children the artistic ability to draw the images.


Provocations:

In order to have the children interested in The Crayon Box that Talked I will promote the idea that in order to accomplish some tasks teamwork is needed. In order to do this I will lay out a large sheet of white paper on a wall or the ceiling. On one end of this paper there will be some green grass and at the other end there will be a blue cloud. The children may realize that there is a large gap between the grass and cloud. Another way to provoke the children’s interest will be to have an empty felt crayon box on a felt board. Each day I will add a felt crayon outside of the crayon box. Children might wonder why the crayons are not in the crayon box.


Ways of telling a story:

1. Felt Story: I will either make the felt story by using a variety of coloured felt, scissors, and a glue gun or purchase the felt set for this book from kinderteacher.com for $15.00.
2. Finger Puppet: Using a thin glove and different coloured felt, I will create finger puppets resembling the crayons. For the crayon box I will cover felt over a cardboard box. The box will have a lid that opens, allowing the crayons to pop out and the bottom will be open, allowing my hand to fit though.
3. Interactive Story: I will create five different coloured crayon tips. The tips will resemble hats for children to wear. Each hat will be made out of thick art paper covered with different coloured felt. For the crayon box I will get a folding laundry basket from Ikea and stitch Crayon Box on the front. The story will start off with the children away from each other and in the end they will fit together in the crayon box.
4. Story Line: Using a clothesline, small clothes line pins, and the felt characters or laminated characters from the book I will create a moving story. Certain characters will be pulled along the clothesline, while some will be attached to a popsicle stick and moved along manually. This way of storytelling has the option of being participation based.


I will stop and have the children wonder on the page with the blue crayon saying, “something is very wrong”. At this point in the story, children can see that the crayons do not like each other and their expressions are unhappy. I will ask the children “I wonder what is wrong?” and “I wonder why everyone is so unhappy?”. I will also have the children stop and wonder on the page the crayons are dancing around the page “watching till I was through”. The children can see that the crayons are happy, but they have not been told why yet. I will ask the children “I wonder why they are getting along now” and “I wonder why they are all so happy?”. I may not chunk this book because it is a very short story and it would interrupt the rhyming scheme. However the page “I took it home with me” would be the best place to stop because the children are left wondering why the crayons are not friends, why the little girls would bring them home, and what will she do with them. At this point in the story there are a lot of wonders, if I were to chunk the book here, I would have the children colour with crayons. It would be interesting to see what they would draw at this point in the story.


Extensions:

1. Colour: Using the long piece of white paper from my provocation with the grass and the cloud, I will lay it across the ground. I will have children pick out a colour and have them draw together. I will encourage them to blend their images together. I might even incorporate paint into this activity to have the children see the different colours created from blending. After this activity, I will post their sharing experience in the same spot the blank picture was placed.
2. Parachute: This activity will take place outside. After parachute safety rules are explained, I will have the children form into a large circle around the parachute. As a team we will raise the parachute into the air and play age appropriate games. Afterwards we will place the parachute on the ground and re-form a circle around it. We will discuss how a team was needed to play with the parachute, that one would not do it alone.
3. City: I would put the children into separate groups and have them build together a house out of blocks. Once the children finished their homes I would ask them to find a way to connect each home. By working to together building roads or moving their homes closer, they will have succeeded in making a city. This activity will provide the children with a physical challenge and problem solving to move their own group creations into a larger group. The city could continue to build.

Reference:

DeRolf, S. (1997). The Crayon Box that Talked (M. Letzig, Illus.). New York: Scholastic Inc.
The box of crayons that talked on PhotoPeach

The little mouse, The red ripe strawberry, and the big hungry bear.


Wood, D., & Wood, A. (1984). The Little Mouse, The Red Ripe Strawberry, and The Big Hungry Bear. Child's Play (International) Ltd.

ISBN: 0-85953-012-4

This beautiful book by Don and Audrey Wood is an intriguing conversation between the narrator and a small mouse. The mouse is intent on picking a delicious red ripe strawberry, but is alarmed by the narrator’s warning about the big hungry bear, who “loves red ripe strawberries”. The mouse attempts to hide, guard and disguise the strawberry in attempt to protect it from the absent bear. This book is wonderful for children 3-5 because of the beautifully detailed illustrations, simple text and humour as the mouse tries various ways to save his strawberry.

Children are drawn to the cute little mouse and how his animated expressions change throughout the story. The storyline is simple and easy to follow, . with enough repetition so that the children will soon be able to anticipate what is coming and chime in along with the reader. In the end, the mouse shares his strawberry with the narrator, making it impossible for the big hungry bear to find it. The mouse and narrator’s “win win” solution is a great ending to a captivating picture book. This simple story is also humorous and interesting to adults. The identity of the narrator is unknown, but has the reader wondering if a very clever bear might have “out-foxed” a little mouse.  Originally released in 1984, this book is timeless and the subtle reminder about the benefits of sharing resonates with both children and adults.
The illustrations are beautifully rendered in soft pastels and fine detail, bringing the story to life.  The fuzzy texture of the little mouse tempts us to stroke his soft looking fur, and the ripeness of the red strawberry makes our mouth water.  The mouse’s animated expressions change from pleasure, alarm, fear, panic, and back to pleasure as the story progresses.    

This book is quite simple and short so I would not chunk it, however there are many good places to stop and wonder, or ask the children to predict what will happen next. Even before opening the book I could read the title “The Little Mouse, The Red Ripe Strawberry and The Big Hungry Bear” and then ask the children to predict what the story is about, and what will happen. On the second page I would stop and wonder why does the mouse want to pick the strawberry? What will he do with it? There is also room to discuss how we know when strawberries are ripe, and not ripe. At the very end of the book you can wonder where the big hungry bear is, and get the children to provide their guesses.

One great way to generate children’s interest in this story is to explore the look, feel, smell and taste of real strawberries. Providing a base of appreciation and familiarity for the fruit will give a deeper connection to the mouse's desire to save the strawberry, and perhaps the bear’s desire for it. It would be best to do this in strawberry season when the fruit is relatively inexpensive and readily available. I would begin with an exploration of how a strawberry looks, by having children use magnifying glasses to look closely at the parts of a strawberry, anddraw or paint what they see.  The children can, share their drawings with the other children, commenting on what aspects of the strawberry they accentuated (shape, seeds, colour, etc.). I would then cut the strawberries in half and invite the children to explore the inside, using the magnifying glass and painting or drawing how it looks to them. Finally, time to taste the strawberries! I would tell the children to pick up the strawberries, describe how they feel and smell, then ask them to taste them and describe the taste.  Planting/ tending to strawberry plants would give children an even deeper appreciation for the process and time it takes to grow a perfectly red ripe strawberry. If you don't have garden space you can easily grow plants in small pots.

This story could easily be presented on a magnetic board,, by attaching magnets to the back of sturdy pictures of the mouse, ladder, strawberry, chains, knife, etc.  It would be also be fun to display different scenes on the four sides of a cookie tin. I think that turning the cookie tin to reveal the next scene would build anticipation and excitement for the children. I would need an alarmed version of the mouse as well as the happy version, and a whole and half strawberry. 
I can find the pictures online or use a colour photocopier to copy the illustrations out of the book, and have them laminated before attaching magnets. I would like to find a background that resembles the drawings in the story, similar to the pastel style illustrations. The laminated pieces would be strong enough to be used on a story clothes line as well! 

I would like to make a mini stage with 3 dimensional figures that have magnets attached, which can be controlled from below the stage with a magnet wand. I would need all the same pieces as the story using the magnet board, but I will make the pieces from model magic and glue magnets on the bottom. I believe the children would really enjoy performing the story themselves, leaving room for their creativity to reinvent/change the story.  This would also help them realize that when they are playing with their other toys, they are also creating stories that others might also enjoy.
I would like to present this book as a felt story. I would need a little mouse, a ladder, a strawberry, a strawberry plant, a pile of dirt to put over the strawberry, a key, chains or chained strawberry, 1 pair of large funny glasses to disguise the strawberry, 1 pair of small funny glasses to disguise the mouse, a knife, and a strawberry cut in two. I can make the pieces by finding pictures online and printing them onto transfers. They can then be ironed onto white felt pieces.

Another way I can present this tale is by using story blocks. I will use square wooden blocks with pictures from each scene glued on different faces of the blocks.  The story can be told stacking the blocks, lining them up or a combination of the two. I will sand the blocks to ensure they are safe to be handled by children, scan and print pictures from the story and glue them on the blocks, and cover them with modge podge or a clear lacquer. I would like to have one block with different mouse expressions on different sides, and another with different strawberries on all sides. I want the story to flow when told so I will have to coordinate the placement of each picture for ease of presentation. Perhaps I will write a script for the words in conjunction with how the blocks must be placed.  I like the idea of creating something durable that the children can manipulate to tell the story themselves. They will have to use their thinking caps to turn the blocks to the right scene.

The activities that I suggested as provocations could also be a good extension activities. Growing or taking care of strawberry plants, exploring the sensory aspects of the fruit in addition to sight and taste. Perhaps a good activity would be cutting strawberries in half, working on the children's fine motor skills. Strawberries are quite soft so it would be appropriate to provide the children with plastic knives. This is a nice way to promote sharing, working with a partner.

Something many children wonder about towards the end of the story, is what the big hungry bear looks like. A good extension piece would be to have the children draw what they think the big hungry bear looks like. I like encouraging artistic expression without an example to copy, which encourages the children's creative and individual thinking. When there is nothing to copy or compare to, the opportunity for free expression is wide open.

Another extension that I would like to make is a discovery bottle. I will fill a small plastic bottle with rice or another small material, and put in small characters from the story. The children shake the bottle and find the characters from the story. I will include a mouse, a strawberry, a ladder, a chain and a lock. It is an activity that promotes attention and includes the excitement of discovery. It would be a good activity for a child playing on their own, and they can spend time discovering pieces of the story.

A song that would pair well with this story is:

Under a tree (clap clap)
behind a house (clap clap)
there lived a teeny (clap clap)
tiny mouse (clap clap) 
she loved to dance (clap clap)
she loved to tap (clap clap)
but most of all (clap clap)
she loved to clap (clap clap)
she clapped all night (clap clap)
she clapped all day (clap clap)
she clapped to frighten (clap clap)
the BEAR away (clap clap)

(I exchanged the word bear with the original "Cat". If the children are familiar with the song they will find this funny and connect it with the story)

Another felt board "search" game that I could make with felt pieces is looking for a mouse behind different coloured houses. I can make many coloured house shapes from felt and hide a little felt mouse behind one. Have the children chant "little mouse, little mouse, are you behind the (name a colour) house?" Children love guessing games and this is easy to repeat with the rhyme.


Little mouse, the red ripe strawberry and the big hungry bear on PhotoPeach

Lost and Found


Jeffers, Oliver. Lost and found. UK: 2005. Print.
isnb (10: 0007150369)
The book "Lost and Found" is a story about friendship. The book starts off with a penguin at the little boy's door step, without a second thought the little boy assumed that the penguin was lost and he took it upon himself to return the penguin to wherever it came from. He took the penguin to the "lost and found office" and asked if anyone was looking for a penguin, no one was. He went along asking birds and his floating duke. When none of those were help, he looked up where penguins came from, he found out they came from the North Pole. He and the penguin made a boat and set off in a mission to go to the North Pole to return the penguin home. As they set off the little boy shared his stories with the penguin and the penguin listened to him the whole way to the North Pole. As time passed they were finally at the North Pole and it was time for the penguin to go home, the penguin got off the boat and the little boy started to paddle his way back home. Before he could go very far, he realized that the penguin seemed a lot sadder to be without the little boy then to be "lost" as the little boy realized that maybe the penguin wasn't actually lost, he just was looking for a friend the little boy paddled back to the North Pole, looking for the penguin. He searched and searched for the penguin but he was nowhere to be seen, right before he was about to give up he spotted the penguin, they hugged and returned to the little boys house but this time as friends.
I really fell in love with this book for children ages 3-5 years old because I thought that the story line had a lot of meaning and children can learn about friendship, and they can also learn to be curious and to wonder about different things around them. The drawings in the book play so well with the emotions the author, Oliver Jeffers tries to portray for example: When he was outside asking the birds, he used a nice neutral color to make us feel what the characters feel in the book. And he also did that with the ocean with the way he drew the waves and the colors he used to go from day to night on the same page. In the day he put clouds and during the night he made the sky grey and added stars. I really enjoyed the illustration in the book because I felt like there were very calm and neutral the simplicity in it was what I thought was beautiful.


Provocations:
1. I would try and get the children to make their own North Pole, I would take white paper and hang it from one side of the room to another and ask the children to paint what they think the North Pole looks like, what animals they assume live in the North Pole.
2. Take a screen shot of the movie, make it colored and big hang it by the entrance so they can see it first thing in the morning, I will not ask them to look at it. I want them to look at it themselves; I will also have a smaller photo in the classroom.
3. I would pick 2 penguin songs and 2 friendship songs and sing them over and over again for over a week. I would sing one in the morning and one in the afternoon, I would do that in a pattern for example: "South Pole visit "and "if you're friendly and you know it" for day 1 and "Penguin family" and "Funga Alafia" for day 2.

Present the book:
1. Shadow puppets-
- props: cardboard, black construction paper, light, sticks, over head projector, a cut out of the boy and penguin, 'lost and found' office, the seagull, his duck and the boat.
-What to do: right as the children come in from being outside I would use one of the relaxing songs from my cd to calm the children down and slowly turn off the lights one by one. Then when all the children are seated at the tables and they are sitting calmly, I would ask children by tables or by what they are wearing that is in common with each other to go sit on the ground in front of the projector facing the area of my presentation. I would keep it a surprise by either handing out blind folds for them to wear for a VERY VERY short amount of time OR I would hang a huge bed sheet to cover the area that the shadow puppets would take place. I would tell the children that they can take the blind folds off when the music playing has come to a stop. And when they do that I will start telling the story using my shadow puppets.
2. Story vine-
props: string, cut out of the characters and it will take place outside
What to do: I will take the children outside and when we are all outside I would first do one of the songs I used to do for the provocation then I would hang one string from one tree to another, and if I can't find any then I would ask one of the other teachers to help me hold the line from one end to another. I will then start the story, this is one exercise where I would chunk the story and let the children tell me what to put next I would ask "I wonder who else beside the lost and found office did the little boy ask if they were missing a penguin" and so on till the story is done. At the end of the story I will want to ask if they could connect the songs to the story, I would help by giving them hints, I would ask questions like "I wonder if the penguin and the little boy can sing "friendly and I know it" together, after they have gone on that journey together"
3. Felt story-
props: again, the different animals and boy cut out shapes on felt material
What to do: I will start off by talking about how the boy went around and asked if anyone had been missing a penguin, then I will proceed to the when he is in the ocean and telling stories to the penguin and the last part would be the part where he drops the penguin off and right before he's about to turn home I would end the story. I would start a discussion with the children about what they "wonder" happened to the little boy and the penguin.
4. Movie:
props: TV - I would show the movie last, out of the four ways to present the story. Because I what to do: want them to actually witness the characters moving and interacting with one another. I would do this last before I present the story, I want them to experience the characters alive and see the emotion themselves then I would re-read the story to the children. Ask them questions about what they liked better the movie or the book, and I would try to make them wonder what the differences were between the book and the movie. The point of this would be so the children can feel free to ask questions, wonder and be curious infront of their peers because I know I didn't have that chance and I think it held me back a little bit because I was never comfortable enough to that, but I want to create some time for the children to talk. I would also use a talking stick that I will make that will be in the form of the the 'south pole' flag, on one side It would say "south pole" on the other side I would say "my turn" and I would tell the children that whoever has the talking stick is the child you would have to focus your attention on and etc. I would pass the stick around in a circle, and if a child hadn't yet come up with an idea, they can pass and they will have a chance with the talking stick once we go around the circle.
Extensions
1. I would like to print pictures of the penguin, multiple ones and hide them around the class room, split the children into pairs and do some sort of scavenger hunt and when they have found the penguins I want them to build an environment based completely on where they want their penguins to live. It doesn't have to be in the North Pole, I want to give them the chance to connect to the book based on their imagination. All this would be contained in a shoe box using paint, sticks, rocks pictures and anything else they want too.

2. I would go through each page of the book with the children and ask them what emotions they thought the little boy and the penguin felt, I would help them by the way I read the book putting emphasis on words the author used to show emotion. After I am done, and the children have come up with words that describe the emotion I would let them take pictures of each other acting out the emotions and make it into a book that way I can bring the children together, and talk about the friendships and relationships that the children might have with people in their lives that is like the little boys friendship with the penguin. I would use a camera, paper, construction paper, laminate (maybe) and use ribbons or staple to pages together into a shape of a book.

3. I would try to teach the children about the different animals that live in the arctic weather and I would want to teach the children about different animals, what they eat, what their strengths and weaknesses are, in what weather conditions they can live. I would want children to connect these animals to certain things in their life, so I would make a booklet with the different animals on them and on the other page trace out what is equilvent to that animal's weight or height. For example: page 1: would have a polar bear with two of its cubes and under them I would write little facts about the polar bear- where it leaves, why the fur is white, why it's so "fat", what it eats and etc. page 2: would be something children are familiar with or I can teach that is same weight or height of the polar bear example: an empty u-haul weights the same as a polar bear 2,210 pounds. I want this exercise to teach children about making connections with things that are not in their ordinary life with things that are. And I would also, let the children decide what animal they like out of the book, after they have chosen I will give them the animal traced out on a huge piece of paper and I will cut up magazines, newspaper, construction paper, paper towels and such for them to put in the traced out animal. I would also let them use crayons, googly eyes, string and other material to complete their animal. After that I would ask them what they liked about their animal the best and write it down underneath for them. And we can share them with everyone while they are done.
Lost and found on PhotoPeach